Monday, May 28, 2018

Monday Musings, Designing a Creative Ritual

I've been thinking about what gets me going when I start working in my sewing room, and the topic of designing a Creative Ritual.  I think most of us have a Creative Ritual whether we recognize it as such or not!

It doesn't have to be anything elaborate or time consuming, just a routine that will help tell our brain that it is time to get started on our creative work.  This helps us to calm down and become focused on our task and allows us to have a positive mindset while we work on our projects.

When I am ready to sew, I like to put some nice smelling oils in my diffuser, then turn the page in my Daily Art book to the current date.  I take a minute or two to read the quotation and look at the painting for the day and just think about what the artist was trying to capture, the mood and the colors.  It takes just a short time, but I find that it clears my mind and enables me to begin my daily sewing with an optimistic mind and calm spirit.  It's as simple as that!

I often also find myself tidying up before I start sewing, but I really want to make more of an effort to tidy up at the end of my sewing sessions so I can start my days with a clean(er) slate!

Do you have a Creative Ritual?  What do you do?  


My daughters got me the Young Living starter kit for Mother's Day last year, and I am really glad that they put me on this journey. I have been happy to have access to products that are healthier for my body and to be able to reduce my use of the many toxin filled products I had in my home previously.  I really enjoy their cleaning products, and use several of the dietary supplements - and definitely feel the benefits of aromatherapy in my daily life, I feel more relaxed and sleep better than I have in years.  I'm not interested in building a large business out of selling their products, but I definitely enjoy them and wanted to share that with you.  If you are interested in purchasing their products or signing on as a member you can use my referral link and I do get credit for that, but other than that I have no plans to spam you with constant talk about this, just a one time share and shout out to something that I feel benefits my life :)  Click here to see more about Young Living oils.

Saturday, May 26, 2018

Christmas All Year Block 5 - Spools

I hope you are enjoying my Christmas All Year block of the month as much as I am!  With this block we are officially halfway through the series - and now I am going to start stretching you a bit...but gently.

Are you ready for some mitered corners?   Otherwise known as Y-seams.  This technique might be intimidating to you, but this little block is perfect for learning them and practicing your technique.  That's how I got to be a pro at doing them - I made a quilt that had 160 of them - after doing it that many times, I can do them in my sleep now!

The key to a perfect y-seam is to NOT stitch beyond that 1/4 inch seam allowance.  Just remember that and you will be fine.

This block has four spool units.   Here are the pieces for my first one.

You may have a ruler with a hole in it so you can mark those 1/4 seam allowance intersections at the corners, but if not you can easily do this with a regular ruler marked at 1/4 inch intervals.  Just line up your ruler so you have 1/4 inch sticking out and put a dot on each side, a quarter inch from the edges.  Repeat on the other edge, and you are ready to sew.  Sew from one dot to the next, backstitching to secure the ends of the seam.
Match center of fabrics

Find the center of your spool, and the center of one of the background strips and match them up.  You can pin or put a clip to hold them together, then sew your seam. (Make sure your edges line up, I have the bottom one pushed out a bit so you can see how I've lined up the centers in the photo above)
Your finished seam should look like this.  Now we are ready for the second seam!
Find the center of the next side of the spool and the center of the spool end.  Match them up and sew the second seam, making sure you do not sew over the first seam, just right up to it.
Ready for that nice mitered (y-seam) corner?  Fold your block in half diagonally so that the sides of your block are nice and lined up, push the seams toward the center (press them if you like) and the center will be folded diagonally.  Once you have it lined up nicely, use your ruler and place it so that you can draw a straight line from the point where your seams end to the corner of the edge fabric.  You can put a pin to hold everything in place.  Sew on this line, making sure not to stitch past the previously stitched seams.

Open your corner out, and this is how it should look!  If you have a pleat in your corner, you probably stitched over another seam, or your fabric wasn't smoothed flat.  If you have a hole, you didn't stitch close enough to the the corner.  It's a short seam, so go ahead and pick it out and try again if you aren't happy with it!  That's the beauty of this block, the seams are short enough that it's not a huge pain to get out the seam ripper.

Continue adding the rest of the pieces in the same manner.  Press all seams toward the darker fabric (most likely the spool).  Each unit should measure 6 1/2 inches, make four and sew them together to complete your spool block!

I hope you enjoy making this, and don't say too many bad words!  Make sure you go pick up the pattern on Etsy -

Complete Pattern

 I even included directions for making it without those Y-seams, but I hope you try the technique anyway.  Once you get the hang of it you can do so many fun things, like fancy borders, Attic Windows, and even sew hexies by machine!  Definitely a great tool to have in your tool box!

If you make a block, share it on facebook and tag me - @pamelaquilts - I would love to see your version.  Have a wonderful weekend, and go play with fabric!

Thursday, May 24, 2018

Coming back down to earth....

What a fabulous weekend we had at Spring International Quilt Market!  It was totally overwhelming, so many awesome vendors, classes, and people to meet.  My eyes, heart and brain are totally full, and though I want to blog about it all, right now I am out of words - the introvert in me needs to recoup from so much input!  

Here we are after closing the market down on friday evening - so much fun looking at all the fabrics and helping choose what we'll be stocking in the shop at Threads That Bind this fall!  Everyone loved how our outfits coordinated - it wasn't planned that way at all.  My top was made out of Island Batik Rayon (Iris Rayon) - it was so comfy to wear and I got compliments everywhere on it.  This piece was provided in my first Ambassador box this year, and I love it!

This is Jessica Caldwell of Desert Bloom Quilting!  She's a fellow Island Batik Ambassador and we were there taking our first class with Tammy Silver of Tamarini's - she is a designer with Island Batik.  I love her sweet Georgia accent!  She was teaching guided improv, which was quite fun.  This was a great way to start off because I already had a connection with these ladies which really helped settle my nerves.  Plus, Jessica and I had to wait for our friends to arrive so we got to sit and chat while we were waiting - I really enjoyed getting to know her better!

So, off we started down the aisles.  So much to look at!

Aren't those miniatures to die for?  It was hard to concentrate with all the quilts to look at, patterns to see, notions to consider.  I was there with my quilt shop, so I had to make sure I was keeping an eye out for things for the shop, but oh my - the inspiration for quilting designs, colors and displays.  Plus people to meet and chat with!

Finally we got the Island Batik booth!  It was so exciting to see my Bloom table runner hanging in the British Rose grouping!  Doesn't my top look nice with this collection?

And I was super elated to see Fancy Feathers hanging so visibly!  This collection is Eclectic Garden - it is a gorgeous line of fabric - I really loved working with it.  The pattern for Fancy Feathers will be available soon, don't worry I will let you know when it's ready to purchase!

Another highlight was visiting the Suzybee Quilting booth!  The Quiltsy Team just finished a challenge with one of her fabrics, and we'll be asking you to help us choose a favorite, so I'll be posting more about that tomorrow.

Goodbye, Quilt Market!  It was so much fun - I was exhausted, inspired and totally overwhelmed by it all!  I have lots of products and things to share, but for now I have a ton of stuff in real life to catch up on...still have some wedding gowns and alterations to finish up, and a quilt that needs to be finished for Fall Market - yep, no rest for a quilt designer, it's from one project to the next!  

I'll be back with more tales from Quilt Market, plus lots more pictures of the Island Batik booth.  Have a wonderful day - go do some quilting!

Monday, May 14, 2018

Monday Musings - the Akrasia Effect

After a productive week of getting things under control in my sewing studio, as well as at the quilt shop I am continuing to think about the effects of procrastination.  I read this interesting article about the Akrasia Effect, and it let me to reading several other articles about why we procrastinate and what we can do about the problem.

 One of the suggestions I read was that when we are putting an unpleasant task off, that we can break it down into more manageable bits so that the task isn't as overwhelming.  Another good suggestions was setting a timer for a small amount of time, and see how you feel after that 5 to 15 minutes.  Often after 15 minutes you get into the task and can work longer.  I have found both to be very helpful in motivating me to work on something that I have been putting off!

One of the projects I was able to finish up this week was getting the Row by Row pattern done for the shop, as well as the sample.  It was a bit of a large task, and I wasn't super excited about doing it for a while, but once I got into it I found that I enjoyed it and ended up being enthusiastic about the design in the end.  I'm not going to show you that quite yet, but once it's public I'll share!


Yesterday I finished up my Lewe the Ewe baby challenge quilt for the Quiltsy team - I had finished the top last weekend, so it didn't take too long to quilt it and bind it yesterday.  I only had a fat quarter of the fabric I liked for the binding and had a close call using it!  Only a 4 x 2 inch strip was left after I finished.  Whew!

Hope your Mother's Day was good - I enjoyed mine.  Make some time to quilt today - it's good for you! 


Thursday, May 10, 2018

Playful Pillows - Think outside the square!

It's time for the monthly Island Batik Challenge!  I had a time deciding what kind of pillow to make for the May challenge, not that I don't have any experience with pillows, maybe because of that!  I wanted to do something really fun and different, but was really caught up in thinking of a square or rectangular throw pillow with embellishments or an interesting quilt block. 


Then, for some reason I thought about making a pillow for my neck - I've really noticed that it would be nice to have some extra support when I sit in the evening and relax.  A quick look on pinterest reminded me of a really cute and fun pattern I've been wanting to make!  Pinterest is really terrific for ideas.  I had even forgotten that I have a whole board of cute pillow ideas.

So, on with my project - this is a super fast and fun pattern that would make awesome gifts.  It's from Sew4Home and is called a 30 minute Neck PillowAnd you really can make it just that fast!  The fabrics I used were provided by Island Batik and are from the Blue Moon line.  I used Wheat in French Blue, Mountains in Purple and Bark in Jelly.  I had a fat eighth bundle and the pieces were the perfect size for my pillow.  Plus the ribbon trim around them was just the right size to use for the end loops on the pillow - bonus! 

I downloaded the pattern pieces, cut out and taped them together, then pressed and cut out all three pieces at once.

Just three seams to sew it all together - don't forget to leave that hole to turn it right side out and add the stuffing!

Stuffing is the hard part.  I really have a difficult time deciding how much is just enough!  It takes quite a bit to fill this one up just right, but I had the perfect amount in my bag.

After you get it stuffed, use a ladder seam to close up the opening.  And that's it!  I think the batik fabric makes a really nice smooth pillow.  This one will be traveling with me in the car for sure - no more cramped up neck from dozing off watching the scenery go by!
Looks like I just woke up from a good nap :)  Guess I could have tamed that wayward curl before I took this picture, but you got the real life me this time!  I love the way this pillow cradles your neck.

It's hard to get a really good picture because it's such an odd shape! 

I still have plenty left from my Blue Moon bundle for more projects.  I used Aurifl 50 wt thread to sew it together - I was using this for another project and it doesn't really match these fabrics, but close enough.  If I'm working with a heavier fabric I usually use 40 wt thread, but for these batiks I think the 50 weight will hold up just fine.  This side of the pillow is my favorite - such a pretty shade of blue!

Make sure you keep your eye out for more fun pillows by the Island Batik Ambassadors (click the tab at the top of my blog to see the blog list).  Go have fun and make a quick project - it'll put a smile on your face!

Wednesday, May 09, 2018

Sewing for Me!

Yesterday I tackled a wedding dress that I thought I had promised to have done last month.  Silly me, the tag actually said mid May, so I am a little ahead even!  I felt so happy to have that out of my hair that I decided to work on a couple of projects for me.

Always make sure you check the cutting layout when you are getting ready to sew a garment from a commercial pattern!  This one was a little unusual as it as for the size I was cutting it required me to fold a third of my fabric over instead of folding it in half.  Also note that when you look at the layout, it tells you which pattern pieces you need for that particular version.  I always make sure to cut them out roughly, then put the pieces I don't need back in the envelope so I don't make any mistakes and cut out a piece that I don't need to. 
I measured the pattern pieces to determine how much I did need to fold over (a bit over 14 inches) and used my rotary ruler to make sure that my fold was straight - this is Island Batik rayon which was provided in one of my Ambassador boxes.  Rayon is wonderful to wear, and not too bad to sew with if you are a little cautious.  It's not so much that it's slippery, like satin or silk, but it is wriggly!  My tactic is to try to make sure it lies as flat and even as possible, then not move it too much.  And use lots of pins when sewing!

This piece is a lovely lavender paisley with blue and pink.  It will be a tunic with 3/4 sleeves.

Then I tackled this piece!  Wow, purple and hot pink!  This will be flirty top with a V-neck.  I almost cried for a few minutes when I thought I was short on enough fabric to make my top, then realized I had forgotten to cut the pattern pieces down to the correct length!  I had enough to add a couple inches, I am kind of hoping it will be long enough to wear with leggings - we'll see.  This is also Island Batik rayon, and I received this in February's Ambassador box. 

With both projects cut out, I decided to call it a night - tomorrow I'm hoping to do some sewing after I finish up the second wedding gown that's waiting for me to take in.  It's good incentive to get it done so I can play.  Thus, I will end this for now so I can get to it!

Happy Wednesday!


Tuesday, May 08, 2018

Is Prom season over yet?

Sigh...it's that time of year when my fingers are crossed that I've received the last frantic call for help with a frothy, bejeweled gown. I do love working with the girls and the dresses are lovely, but after you've done 6 or 8 in three weeks it does lose its charm a bit!  At least temporarily!

After working all afternoon on a beautiful blush gown with tons of beading on the bodice and three layers of tulle over a satin skirt, I did take some time and finish up this custom order journal cover - I think I'll have to made another to add to my shop.   The original was a Project Quilting entry and it sold quickly, plus I got a request to make this one. 
I'm contemplating writing up a pattern for this version - but I think I'd like to figure out a different pieced background for the Dresden sun.  As always, I have more ideas in my head than I have time to get them out!

I just discovered the joy of listening to podcasts as I sew!  So far I have only listened to a few, but am looking for some more sewing/quilting - any recommendations?  I enjoyed listening to While She Naps yesterday, and hope to find more interesting shows to listen to!  Some days I love having something interesting to think on while I am sewing.  At other times, I love the quiet. I guess it just depends on the mood of the day and what's going on in my head.

Have a happy day!


Monday, May 07, 2018

Monday Musings

I have been working on my tendency toward procrastination and thinking about what makes me resist doing certain things that I know need to be done.  I wrote about some of those things on Saturday, and the feedback I got really made me think about diving into those type of thoughts a little more deeply.  I know for me, that when something seems really difficult I am apt to put it off - and most of the time the task is quite achievable, even if it might be challenging.  I found this quote (by unknown) and thought it was perfect!

The best way to get over that hill is to start climbing.

So with that in mind, I tackled the task of enlarging that too snug cover for my Quilter's Planner!

I didn't want to take it apart and add to the lining and the cover, then sew it all back together again, so I decided to be really crazy and use a quilt-as-you-go technique to add a section.  So with a small amount of fear and trepidation I used my rotary cutter and sliced it in two!

 
Then I measured how wide a section that I needed to insert.

This piece will be on the lining side of my planner.  I added 1 inch to my desired width for seam allowances.  Sew with a 1/4 inch seam allowance on each side of the strip.  I have to be honest here and tell you that I sewed one edge to the wrong side.  Then I tore out the correct side and ended up with both sides wrong and had to tear them both out!  Yes, it happens!  When I finally had it all sewn satisfactorily I pressed the seams in toward the new strip and measured for a strip of fusible fleece to be inserted in the gap.
I cut and inserted the fleece, then folded the ends of the strip on the lining side over the edges of the planner.  I cut a piece of wide ribbon and pinned it over the added strip, turning the edges under at the top and bottom.  Then I topstitched it all into place It got a little crooked as you can see from the lining side:
But it looks great on the outside, and that's all anyone will see!
Now the cover fits perfectly on my planner without feeling too snug!

I am glad I spent about a half hour to take care of this right away!  What relatively small project are you putting off today?  Set a timer for 15 minutes and work on it - you might be surprised and get it finished and crossed off your list before you know it!

Linking up for Monday Making!  


Sunday, May 06, 2018

Cover for Quilter's Planner, finally finished!

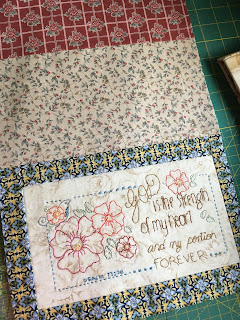
Yay - I finally finished the embroidery on this lovely piece to grace the front of my Quilter's Planner!  I made a big mess in my sewing room finding some fabrics that I loved with it, and put together the cover in quick order :)  I love Jenny's embroidery designs, she has so many lovely ones, plus even a monthly club you can subscribe to!  You can find her blog here:


Sadly, I must have been using the planner pattern for a previous year, because when I put it on my planner I found it was quite snug.  Yep, I looked up the current year's size, and it needs to have 1 1/4 inches added to the width of it.  I will remedy that this afternoon so that the cover will fit properly.

In the meantime - here is what it looks like

And the inside:

May is starting to fill up!  Notice what is happening on May 18 and 19? I'll be at Spring Quilt Market in Portland, OR!  I am super excited, it will be my first one - I am going with the staff at Threads That Bind and am so looking forward to a great time of seeing new fabric, patterns and notions!  Plus meeting a lot of people in real life that I only know online - sew excited!!!!

In the meantime, I am still working on hand quilting the grandmother's flower garden quilt, After a month of stitching about 2 hours a day on it, I estimate I have another two months before it's finished.  But that means in two weeks I'll be half done, right?

Have a wonderful Sunday!  Sit down and do some hand-stitching, it's good for the soul!

Linking up with Kathy for Slow Sunday Stitching 

Saturday, May 05, 2018

Happy Derby Day!

Kentucky Derby day is a red letter day in this household, which I am glad of because it means no house painting today!  What it does mean is that I can sneak off to my sewing room and work on the baby quilt I need to make for the Quiltsy team Baby Quilt Challenge!  I have half a yard of this sweet fabric to use in a baby quilt:

If you would like to see some of the quilts that have been made so far check out our team Pinterest Board - Lewe the Ewe Quilt Challenge.  Some serious cuteness going on there!

I also want to finish up a custom order for a bible cover.  She had me use the word Trust for the cover and I am loving it!


I've been thinking of making myself a cover for quite a while, so I think I may just make myself one while I am at it!  I was a little intimidated by trying to edge stitch these skinny appliques, but a size 10 needle and Aurifil 50 wt thread in red did the trick!    Now I am going to quilt the pieced background in swirls and I will be ready to assemble the cover. 


Here is where we finished up on the house yesterday.  I'd say we've got less than a quarter of the front to finish.  The garage was terrible - it faces west and was sooo dry with the paint falling off of it!  It really soaked up the paint and looks so much better now - we'll be doing a second coat over the summer, one side at a time.  We'll also be trimming those hydrangeas back and painting behind them...for now we just did around them as best as we could.

We have definitely learned a few things from this process, and yes, they apply to quilting as well!

1.  Don't put off the inevitable.  You are going to have to do it sooner or later, might as well start now.
2.  Don't be intimidated by something hard.  You are capable of more than you think! 
3.  Don't worry about perfection.  Finished but flawed is better than unfinished.

Think about all those UFO projects - can you apply these lessons and get one of them done this month?  Give it a try!